How to integrate Siri (iPhone, iPad, iOS) with almost anything via Zapier
How do I integrate my iPhone or iPad (iOS) using Siri with Zapier?
When I discovered I could integrate my iPhone or iPad (iOS) with just about anything via Zapier, it was a revelation. The possibilities and uses are almost endless.
What do I need to integrate Siri and Zapier?
- An Apple device with iOS 12 or later (such as iPhone or iPad).
- Any of the Zapier paid plans (unfortunately the free Zapier plan doesn’t allow the use of Webhooks, required for this).
- A basic understanding of how to use Zapier to automate stuff (or willingness to learn!)
If you’re unfamiliar with how Apple’s Shortcuts app works, this Youtube video by Brandon Butch is a great introduction. Shortcuts is an incredibly powerful and useful tool.
How does it work?
When this is working, you can either press an icon on your home screen on your iPad or iPhone, or say “Hey Siri [whatever you want]”.
It will then take whatever input you give it, such as text, or selecting some options, then send that over to Zapier, where you can use that data in any application.
In the example, it’s just a simple “Ideas” app. You enter an idea, and rate its importance:
You can edit this shortcut and make it collect any sort of data that’s useful to you.
You can add extra fields to collect more data such as selecting items from a list, date, time, text even your current location.
Some ways I’ve used this include:
- Vehicle logbook to track trips and put them into a Google or Excel Spreadsheet
- Continual or Quality Improvement items for an organisation
- Vehicle expenses, which enters the expense automatically into a spreadsheet (along with a PDF of the receipt). It even automatically calculates GST! (Goods and Services Tax if you’re not in Australia, like VAT).
Basically what happens is it sends the data across to Zapier as a Webhook. Then you can use that data in any Zapier Zap, so it will work with any action you can find on Zapier. That means, you could have the shortcut automatically:
- Send an email
- Put something in Trello
- Send a Slack or Discord message
- Add a reminder or calendar entry
- Put something in a Google Document or Spreadsheet
Step 1: Set up Zapier Webhooks
In your Zapier account, make a new Zap, name it whatever you wish.
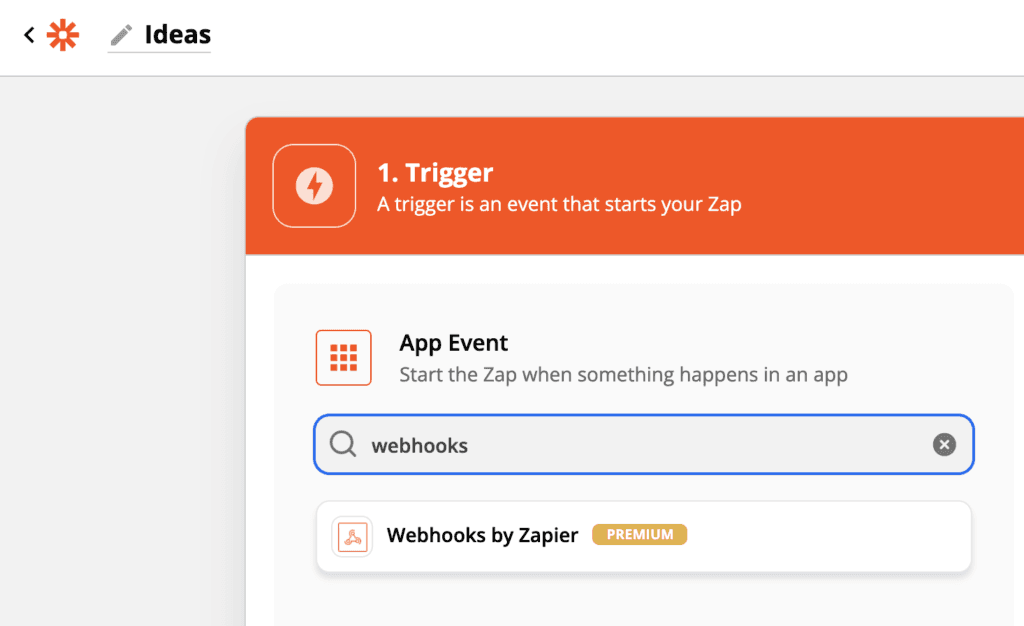
For the Trigger, select Webhooks by Zapier.
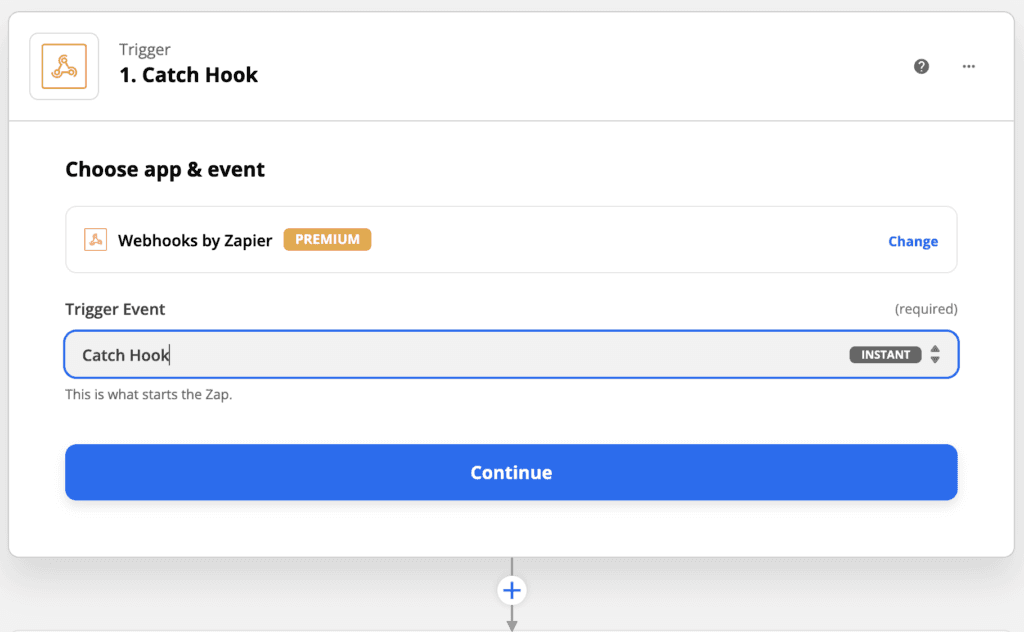
Next, select Catch Hook as your Trigger Event and continue.
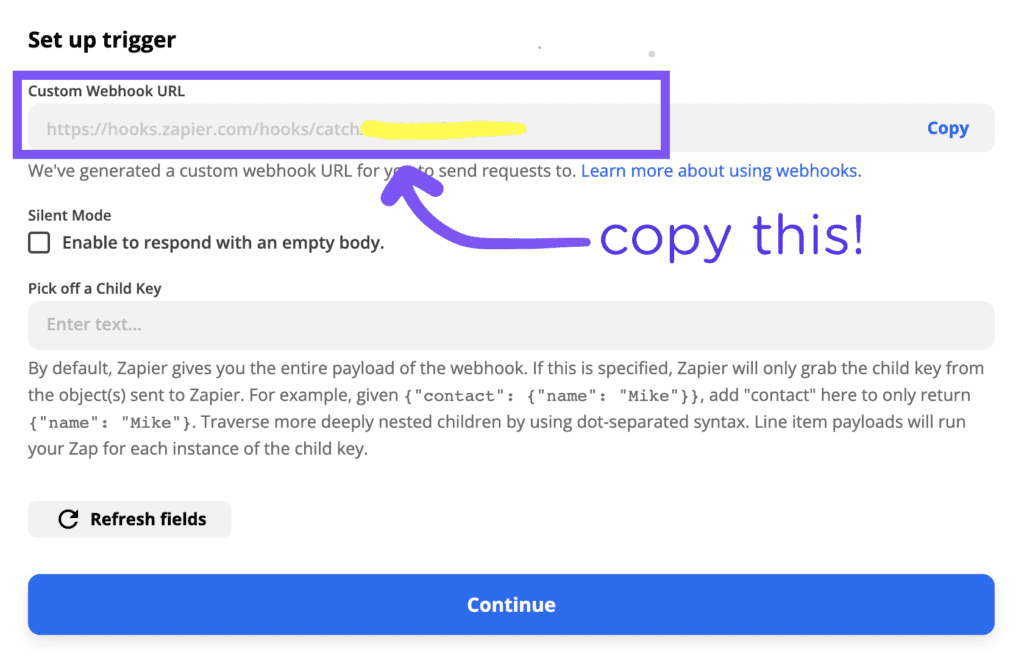
Carefully note and copy down the Custom Webhook URL that is provided. This must be copied exactly as its provided in your Zapier account.
Step 2: Open your iPhone or iPad
The easiest way to get started is to visit this link on your iPhone or iPad:
https://www.icloud.com/shortcuts/07380760f2374fdc8a35b4796fa3318d
Select “Get Shortcut.”
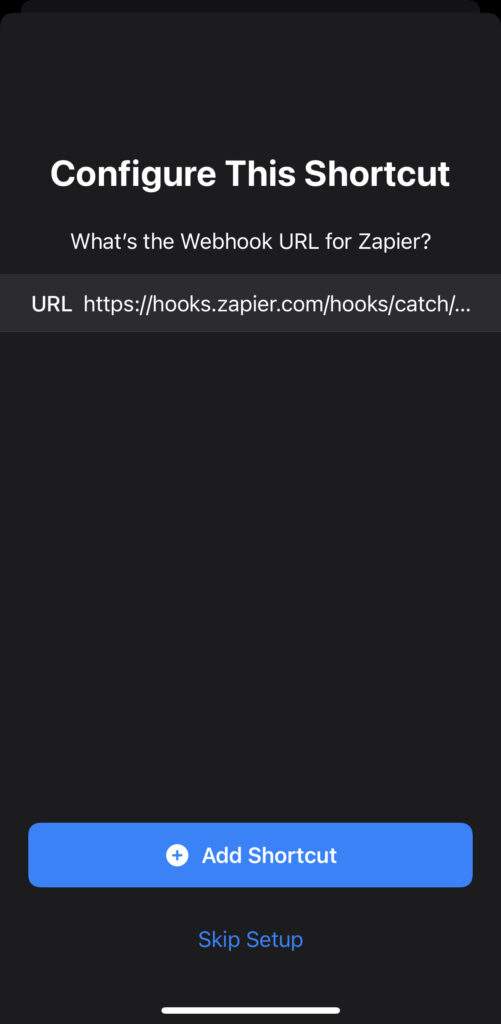
When you add the shortcut, CAREFULLY(!!!) enter the Custom Webhook URL from the previous step.
It will now be added as a new shortcut in your Shortcuts app.
Again, if you’re unsure of how to use Shortcuts, there are plenty of tutorials online, Brandon Butch’s video tutorial is quite good.
Step 3: Test the Webook
Run the newly imported Shortcut then go back to your Zapier Zap you started setting up in step 1.
All going well you should see something like the following:
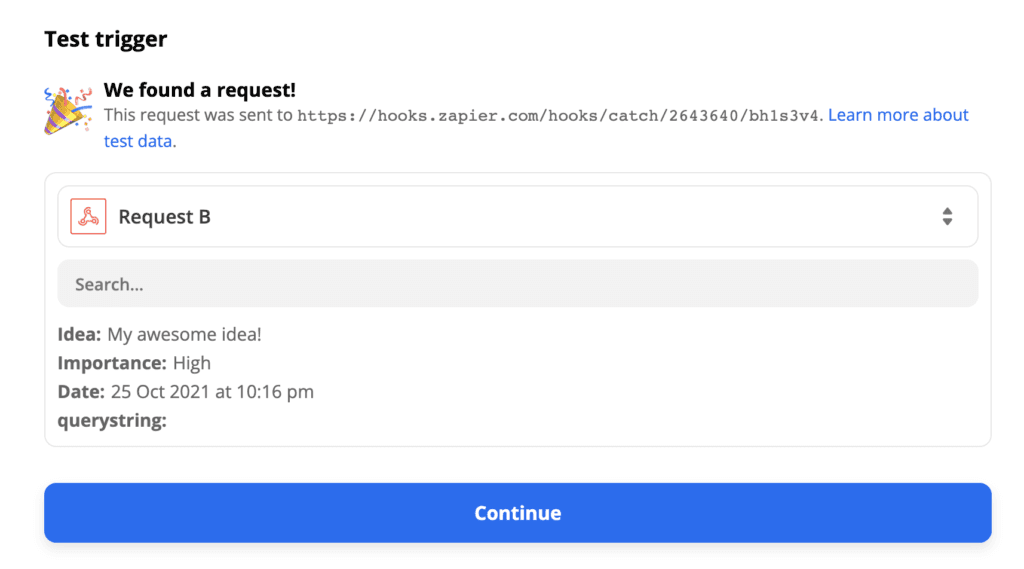
From here, you can use the data from your trigger in any action!
Send it to a spreadsheet, email, Trello card, post to Twitter, LinkedIn, you can automatically do anything with this data.
If you’re new to Zapier, their getting started tutorial here is great starting point.
Case Studies
Accellier Success Stories
Accellier and the NSW Department of Planning, Industry and Environment
Accellier was approached to assist over 50 highly skilled professionals within the organisation achieve Certificate IV in Training and Assessment.
Department of Planning, Industry and EnvironmentDave Hitchcock shares his Accellier story
Watch this video and learn more about how Accellier Education helped Fireground Leadership and Training with their Certificate IV in Training and Assessment qualifications.
Accellier Graduate Story: Marion
Marion, a successful Accellier Certificate IV in Training and Assessment graduate tells her story.
Qualified visual arts trainer video